1. Уводзіны
This manual provides detailed instructions for the YYSWIE D20 10.1 Inch Android 14 Tablet. Please read this guide thoroughly before using your device to ensure proper operation and to maximize its features. Keep this manual for future reference.

Figure 1: YYSWIE D20 10.1 Inch Android 14 Tablet with Stylus Pen
2. Змесціва ўпакоўкі
Праверце, ці ёсць усе прадметы ў вашай упакоўцы:
- YYSWIE D20 10.1 Inch Android 14 Tablet
- Стылус
- Зарадная прылада
- USB-кабель C
- Папярэдне нанесеная ахоўная плёнка для экрана
- Кіраўніцтва карыстальніка (гэты дакумент)

Малюнак 2: Планшэт і аксэсуары, якія ўваходзяць у камплект
3. Прадукт скончыўсяview
3.1 Асноўныя магчымасці
- Дысплей: 10.1-inch IPS HD (1280x800) with eye-care mode
- Працэсар: Quad-Core (1.6 GHz Allwinner)
- Аператыўная памяць: 6 ГБ (3 ГБ фізічнай + 3 ГБ віртуальнай)
- захоўванне: 32GB internal, expandable up to 128GB via microSD card (not included)
- Аперацыйная сістэма: Android 14
- акумулятар: 5000mAh, up to 10 hours usage
- Камеры: 2 МП спераду, 5 МП ззаду
- Падключэнне: Wi-Fi (802.11b), Bluetooth 4.0
- Дадаткова: Includes stylus pen, pre-installed screen protector, parental controls

Figure 3: High-Performance Quad-Core CPU

Figure 4: Storage Capacity Overview
3.2 Фізічныя кампаненты
Familiarize yourself with the tablet's buttons, ports, and cameras.
- Кнопка харчавання: Located on the side/top edge. Used to turn the tablet on/off or put it to sleep.
- Кнопкі гучнасці: Адрэгулюйце ўзровень гуку.
- Порт USB-C: Для зарадкі і перадачы дадзеных.
- Слот для карты MicroSD: Для пашырэння сховішча.
- Пярэдняя камера: Для відэазванкоў і сэлфі.
- Задняя камера: Для здымкі фота і відэа.
- Скід Pinhole: A small hole for factory reset (use a thin pin).

Figure 5: Front and Rear Camera Locations
4. Настройка
4.1 Зарадка планшэта
- Падключыце кабель USB-C да порта USB-C планшэта.
- Plug the other end of the USB-C cable into the provided charger.
- Падключыце зарадная прылада да электрычнай разеткі.
- Allow the tablet to charge fully before first use. The battery indicator on the screen will show charging status.

Малюнак 6: Зарадка планшэта
4.2 Уключэнне/выключэнне
- Каб уключыць: Press and hold the Power button until the YYSWIE logo appears.
- Каб выключыць: Націсніце і ўтрымлівайце кнопку харчавання, пакуль не з'явіцца меню. Выберыце «Выключыць харчаванне» і пацвердзіце.
- Каб заснуць/прачнуцца: Каротка націсніце кнопку харчавання.
4.3 Пачатковая канфігурацыя
Пасля першага ўключэння выканайце падказкі на экране, каб наладзіць планшэт:
- Выберыце жаданую мову.
- Падключыцеся да сеткі Wi-Fi.
- Sign in with your Google account or create a new one. This is necessary for downloading apps from the Google Play Store.
- Review і прыняць умовы.
- Наладзьце блакіроўку экрана (PIN-код, узор або пароль) для бяспекі.
4.4 Устаўка карты MicroSD
To expand your tablet's storage:
- Знайдзіце слот для карты microSD на бакавой панэлі планшэта.
- Акуратна ўстаўце карту microSD у слот залацістымі кантактамі ўніз, пакуль яна не зафіксуецца са шчоўкам.
- The tablet will detect the card and prompt you to format it for use. Follow the on-screen instructions.
4.5 Выкарыстанне стылуса
The included stylus pen is non-charging and does not require Bluetooth pairing. Simply use it directly on the screen for navigation, drawing, or note-taking.

Figure 7: Using the Stylus Pen
5. Кіраванне планшэтам
5.1 Асноўная навігацыя (Android 14)
Your tablet runs on Android 14, offering an intuitive user experience. Common gestures include:
- Націсніце: Выберыце прадмет.
- Правядзіце пальцам: Пракручваць экраны або спісы.
- Звядзенне пальцамі для павелічэння: Павялічыць або паменшыць змест.
- Доўгі націск: Доступ да кантэкстных меню або перамяшчэнне значкоў.
- Панэль навігацыі: Use the on-screen buttons (Back, Home, Recent Apps) at the bottom of the screen.
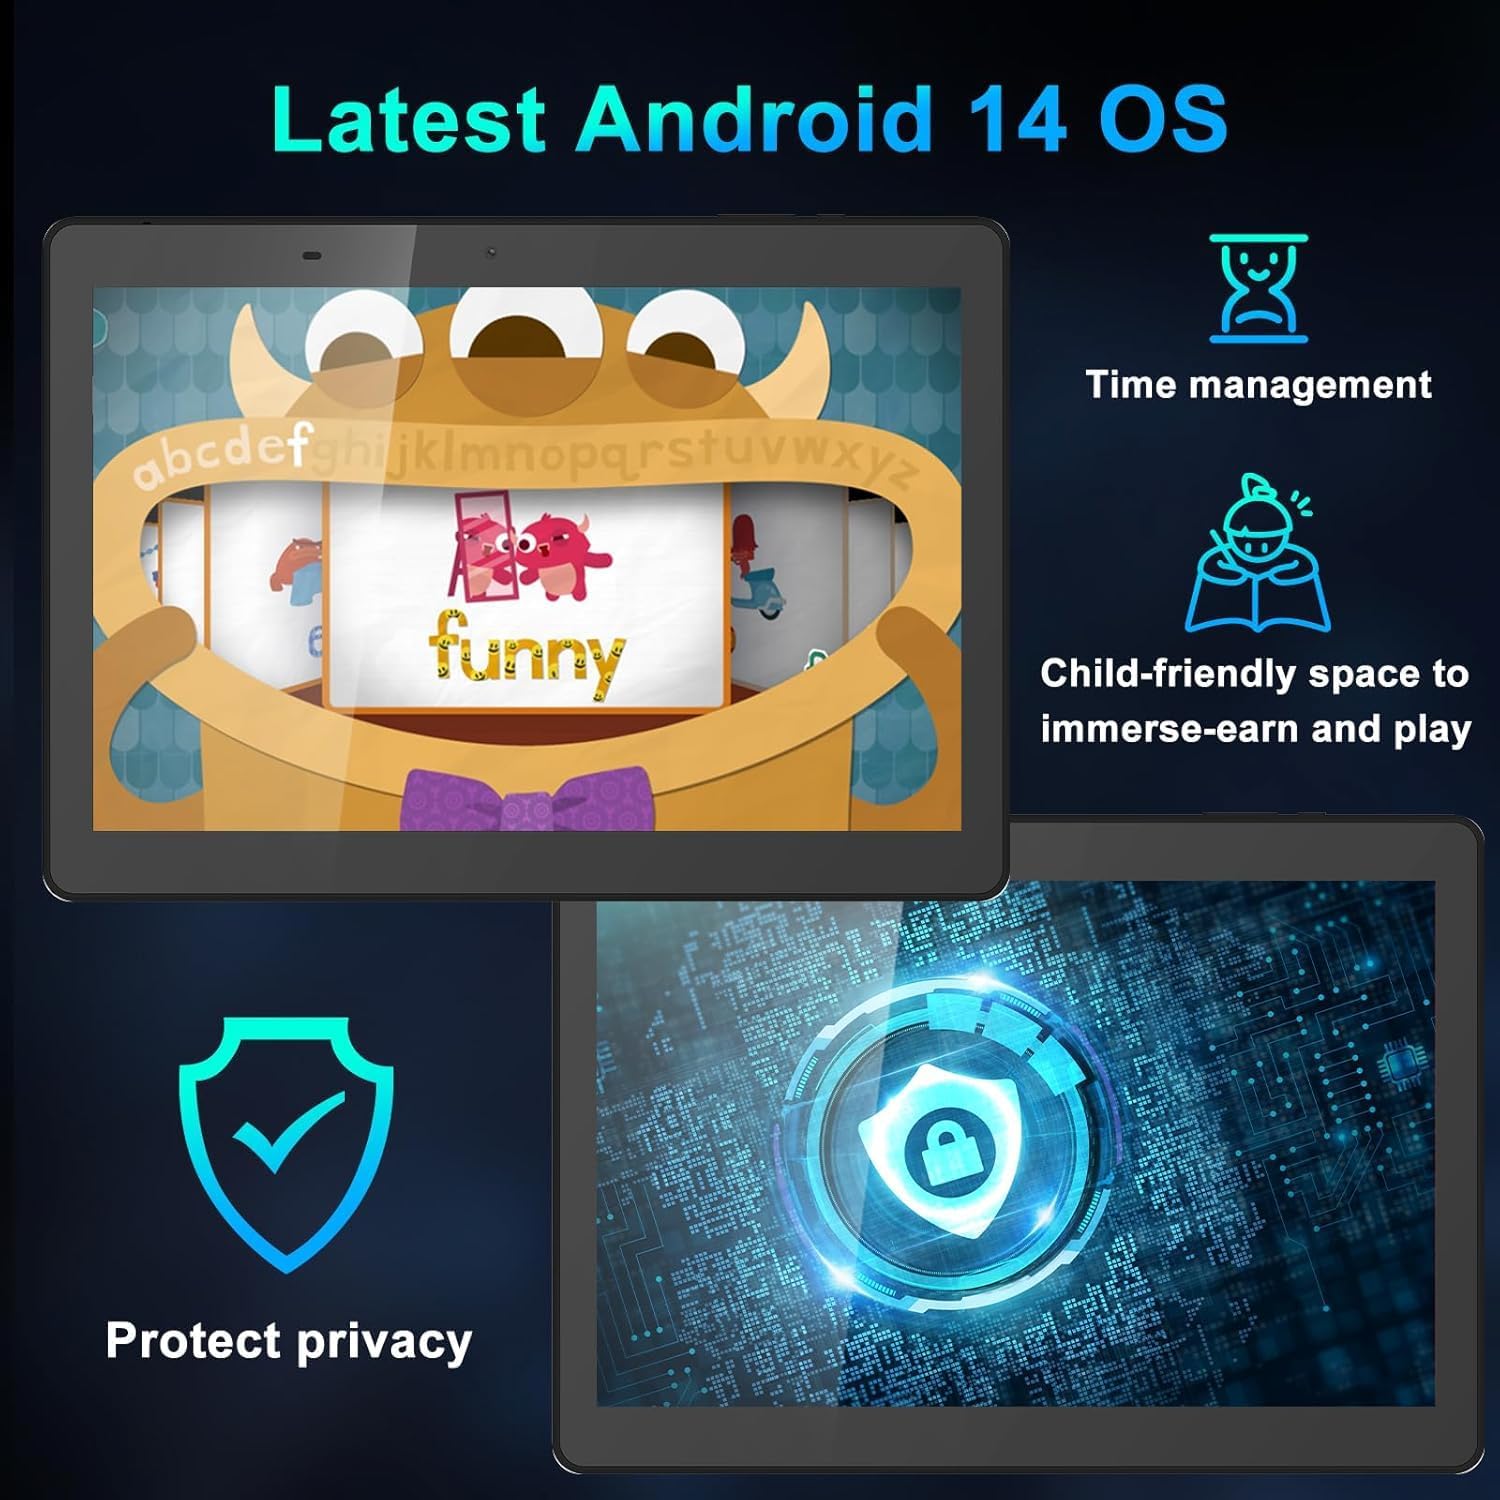
Figure 8: Android 14 Interface Highlights
5.2 Падключэнне да Wi-Fi і Bluetooth
Access these settings from the Quick Settings panel (swipe down from the top of the screen) or through the main Settings app.
- Wi-Fi: Turn Wi-Fi on, select your network, and enter the password if required.
- Bluetooth: Turn Bluetooth on, scan for devices, and select the device you wish to pair with.
5.3 Выкарыстанне камеры
Адкрыйце праграму «Камера» на галоўным экране або ў панэлі праграм.
- Націсніце кнопку спуску засаўкі, каб зрабіць фотаздымак.
- Пераключайцеся паміж пярэдняй і задняй камерамі з дапамогай значка камеры.
- Выберыце рэжым відэа для запісу відэа.
5.4 Бацькоўскі кантроль
Android 14 includes enhanced parental controls. Navigate to Налады > Лічбавы дабрабыт і бацькоўскі кантроль to manage screen time, app access, and content filtering for child profiles.

Figure 9: Tablet Use for Young Users
5.5 Рэжым догляду за вачыма
To reduce blue light emission and eye strain, activate Eye-Care Mode. This can usually be found in Налады > Дысплей or through the Quick Settings panel.

Figure 10: 10.1 Inch IPS HD Display
6. Тэхнічнае абслугоўванне і догляд
6.1 Ачыстка
Выкарыстоўвайце мяккую тканіну без ворса для чысткі экрана і корпуса планшэта. Пазбягайце выкарыстання агрэсіўных хімічных рэчываў або абразіўных матэрыялаў.
6.2 Кіраванне батарэяй
- Пазбягайце экстрэмальных тэмператур, якія могуць пагоршыць тэрмін службы батарэі.
- Для аптымальнага стану акумулятара пазбягайце частай поўнай разрадкі або працяглага захоўвання яго зарада на 100%.
- Выкарыстоўвайце толькі зарадную прыладу і кабель, якія ўваходзяць у камплект.
6.3 Абнаўленне праграмнага забеспячэння
Рэгулярна правярайце наяўнасць абнаўленняў праграмнага забеспячэння і ўсталёўвайце іх, каб пераканацца, што ваш планшэт мае найноўшыя функцыі, патчы бяспекі і паляпшэнні прадукцыйнасці. Перайдзіце па спасылцы Налады > Сістэма > Абнаўленне сістэмы.
7. Выпраўленне непаладак
Калі ў вас узніклі праблемы з планшэтам, звярніцеся да наступных распаўсюджаных рашэнняў:
| праблема | Рашэнне |
|---|---|
| Планшэт не ўключаецца | Ensure the battery is charged. Connect the charger and wait a few minutes before attempting to power on again. If unresponsive, try a soft reset by pressing and holding the power button for 10-15 seconds. |
| Tablet freezes or is unresponsive | Press and hold the Power button for about 10 seconds to force a restart. If the issue persists, try clearing the cache of problematic apps or performing a factory reset (see below). |
| Праблемы з падключэннем да Wi-Fi | Restart your tablet and your Wi-Fi router. Forget the network in Wi-Fi settings and reconnect. Ensure you are within range of the Wi-Fi signal. |
| Акумулятар хутка разраджаецца | Reduce screen brightness, close unused apps, disable Wi-Fi/Bluetooth when not in use, and check for apps consuming excessive power in battery settings. |
| Stylus pen not working | Ensure the screen is clean. The stylus is passive and does not require charging or pairing. If the issue persists, test with finger input to determine if it's a screen or stylus issue. |
7.1 Скід да заводскіх налад
Скід да заводскіх налад сатрэ ўсе дадзеныя на вашым планшэце і верне яго да зыходных заводскіх налад. Перад тым, як працягваць, зрабіце рэзервовую копію важных дадзеных.
- Перайсці да Налады > Сістэма > Параметры скіду.
- Выберыце Сцерці ўсе даныя (скід да заводскіх налад).
- Пацвердзіце сваё рашэнне і ўвядзіце PIN-код/графічны ключ/пароль, калі будзе прапанавана.
- Планшэт перазагрузіцца і пачне працэс скіду налад.
8. Тэхнічныя характарыстыкі
| Асаблівасць | Дэталь |
|---|---|
| Марка | YYSWIE |
| Нумар мадэлі | D20 |
| Аперацыйная сістэма | Android 14 |
| Памер экрана | 10.1 цалі |
| Дазвол экрана | 1280 x 800 пікселяў (IPS HD) |
| Працэсар | 1.6 GHz Quad-Core (Allwinner) |
| АЗП | 6 ГБ (3 ГБ фізічнай + 3 ГБ віртуальнай) |
| Унутраная памяць | 32 ГБ |
| Сховішча з магчымасцю пашырэння | Up to 128GB via MicroSD card |
| Ёмістасць батарэі | 5000 мАг |
| Сярэдні тэрмін службы батарэі | Да 10 гадзін |
| Тыл WebДазвол камеры | 5 МП |
| Фронт WebДазвол камеры | 2 МП |
| Бесправадны тып | 802.11b (Wi-Fi) |
| Bluetooth | Bluetooth 4.0 |
| Вага прадмета | 1.57 фунта |
| Памеры прадукту | 12.2 х 7.48 х 1.34 цалі |

Figure 11: Tablet Dimensions and Key Specifications
9. Гарантыя і падтрымка
9.1 Інфармацыя аб гарантыі
YYSWIE offers a Гарантыя 12 месяцаў for its products. If you experience any issues within this period, please contact our customer support for assistance.
9.2 Падтрымка кліентаў
For any questions, technical assistance, or warranty claims, please contact YYSWIE customer support. We aim to reply to customer messages within 24 hours.
- Інтэрнэт-падтрымка: Refer to the YYSWIE store on Amazon for contact options.
- Падтрымка па электроннай пошце: Available 24/7 for dedicated technical assistance.