1. Уводзіны
This manual provides detailed instructions for the proper setup, operation, and maintenance of your OWLNV L3-850/LRF 6.5-13X HD Digital Day & Night Vision Rifle Scope. Please read this manual thoroughly before using the device to ensure optimal performance and safety.

Figure 1: OWLNV L3-850/LRF 6.5-13X HD Digital Day & Night Vision Rifle Scope.
2. Асноўныя магчымасці
- 1920×1080 HD Digital Day & Night Vision: Offers full-color daytime viewing and crisp black-and-white night vision.
- 850nm IR Illuminator: Powerful infrared illumination for enhanced night vision.
- Built-in Rangefinder: Provides precise ranging up to 1000m.
- Dual Zoom System: Features 6.5× and 13× digital zoom for versatile target acquisition.
- Multiple Reticle Styles: 5 reticle styles with 2 color options.
- One-Shot Zeroing: Simplifies the zeroing process.
- Павялічаны час працы: Да 8 гадзін бесперапыннага выкарыстання.
- 6000 J Recoil Resistance: Durable construction to withstand significant recoil.
- Эрганамічны і лёгкі дызайн: Weighs only 565g for comfortable handling.
- Quick-Detach Picatinny Mount: Easy attachment and removal from rifles.
- Built-in 3D Gyroscope with E-Compass: Ensures steady and accurate viewінж.
- IP67 Waterproof Housing: Resistant to rain and dust.
- Падключэнне Wi-Fi: For iOS & Android devices.
3. Настройка
3.1. Устаноўка батарэі
The device uses an 18650 battery. To install the battery:
- Адкруціце крышку батарэйнага адсека.
- Insert the 18650 battery into the compartment, ensuring correct polarity.
- Securely screw the battery compartment cap back on.
3.2. Усталёўка карты Micro SD
The scope comes with a 32GB Micro SD card. To install the Micro SD card:
- Locate the Micro SD card slot, usually protected by a rubber gasket.
- Open the rubber gasket.
- Insert the Micro SD card with the face forward until you hear a click.
- Close the rubber gasket to ensure waterproofing.
3.3. Усталёўка прыцэла
The scope is equipped with a quick-detach Picatinny mount for easy attachment to your rifle.
- Align the scope's mount with the Picatinny rail on your rifle.
- Secure the mount firmly to the rail using the provided locking mechanism.
- Ensure the scope is stable and properly aligned before use.
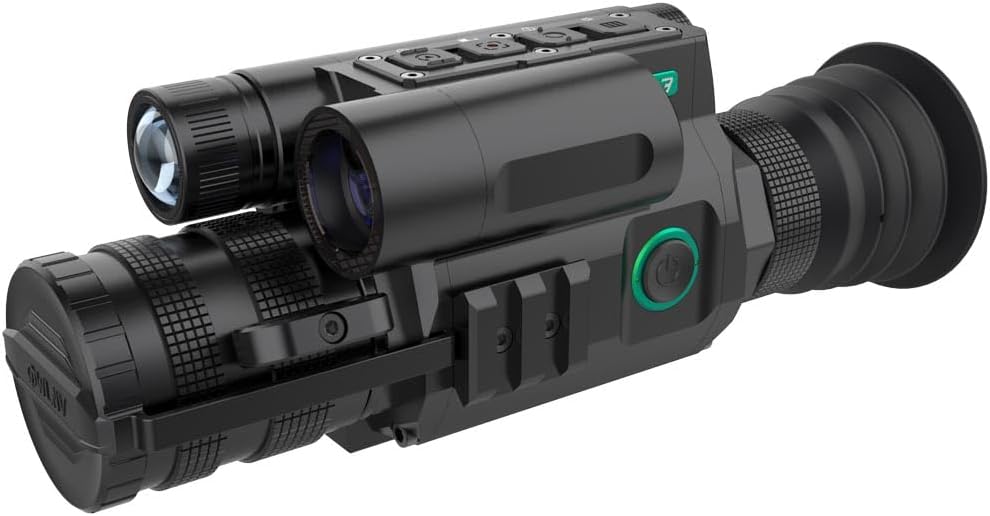
Figure 2: Scope with quick-detach Picatinny mount.
Video 1: Triton StarStrike I & II Night Vision Optic User Guide. This video demonstrates battery and Micro SD card installation, power on, reticle activation, IR modes, zeroing, zoom, focus, recording, and menu navigation for a similar night vision optic.
4. Аперацыя
4.1. Уключэнне/выключэнне харчавання
To power on the device, press and hold the power button located on the side of the scope. To power off, press and hold the power button again.
4.2. Day & Night Vision Modes
The scope automatically switches between full-color daytime view and crisp black-and-white night mode. The powerful 850nm IR illuminator enhances visibility in low-light conditions.

Figure 3: Comparison of Day Mode (color) and Night Mode (black and white) views.
4.3. IR Illuminator Control
The integrated 850nm IR illuminator provides three levels of intensity. Short press the IR illuminator button to cycle through the intensity levels or to turn it off. Long press to switch between black and white mode and IR illuminator.

Figure 4: Visual representation of IR illuminator levels.
4.4. Reticle Activation & Selection
To activate the reticle, press and hold the 'Down' button. The scope offers 5 reticle styles with 2 color options. To cycle through the reticle styles, press the 'OK' button until the perimeter of the reticle is black, then hold the 'OK' button again until the reticle changes. Repeat to find your preferred style. Press 'OK' once more to lock the selected reticle.
4.5. Функцыя маштабавання
The scope features a dual zoom system (6.5× / 13× digital zoom). To zoom in or out, use the 'Up' or 'Down' arrow buttons when not in any menu.
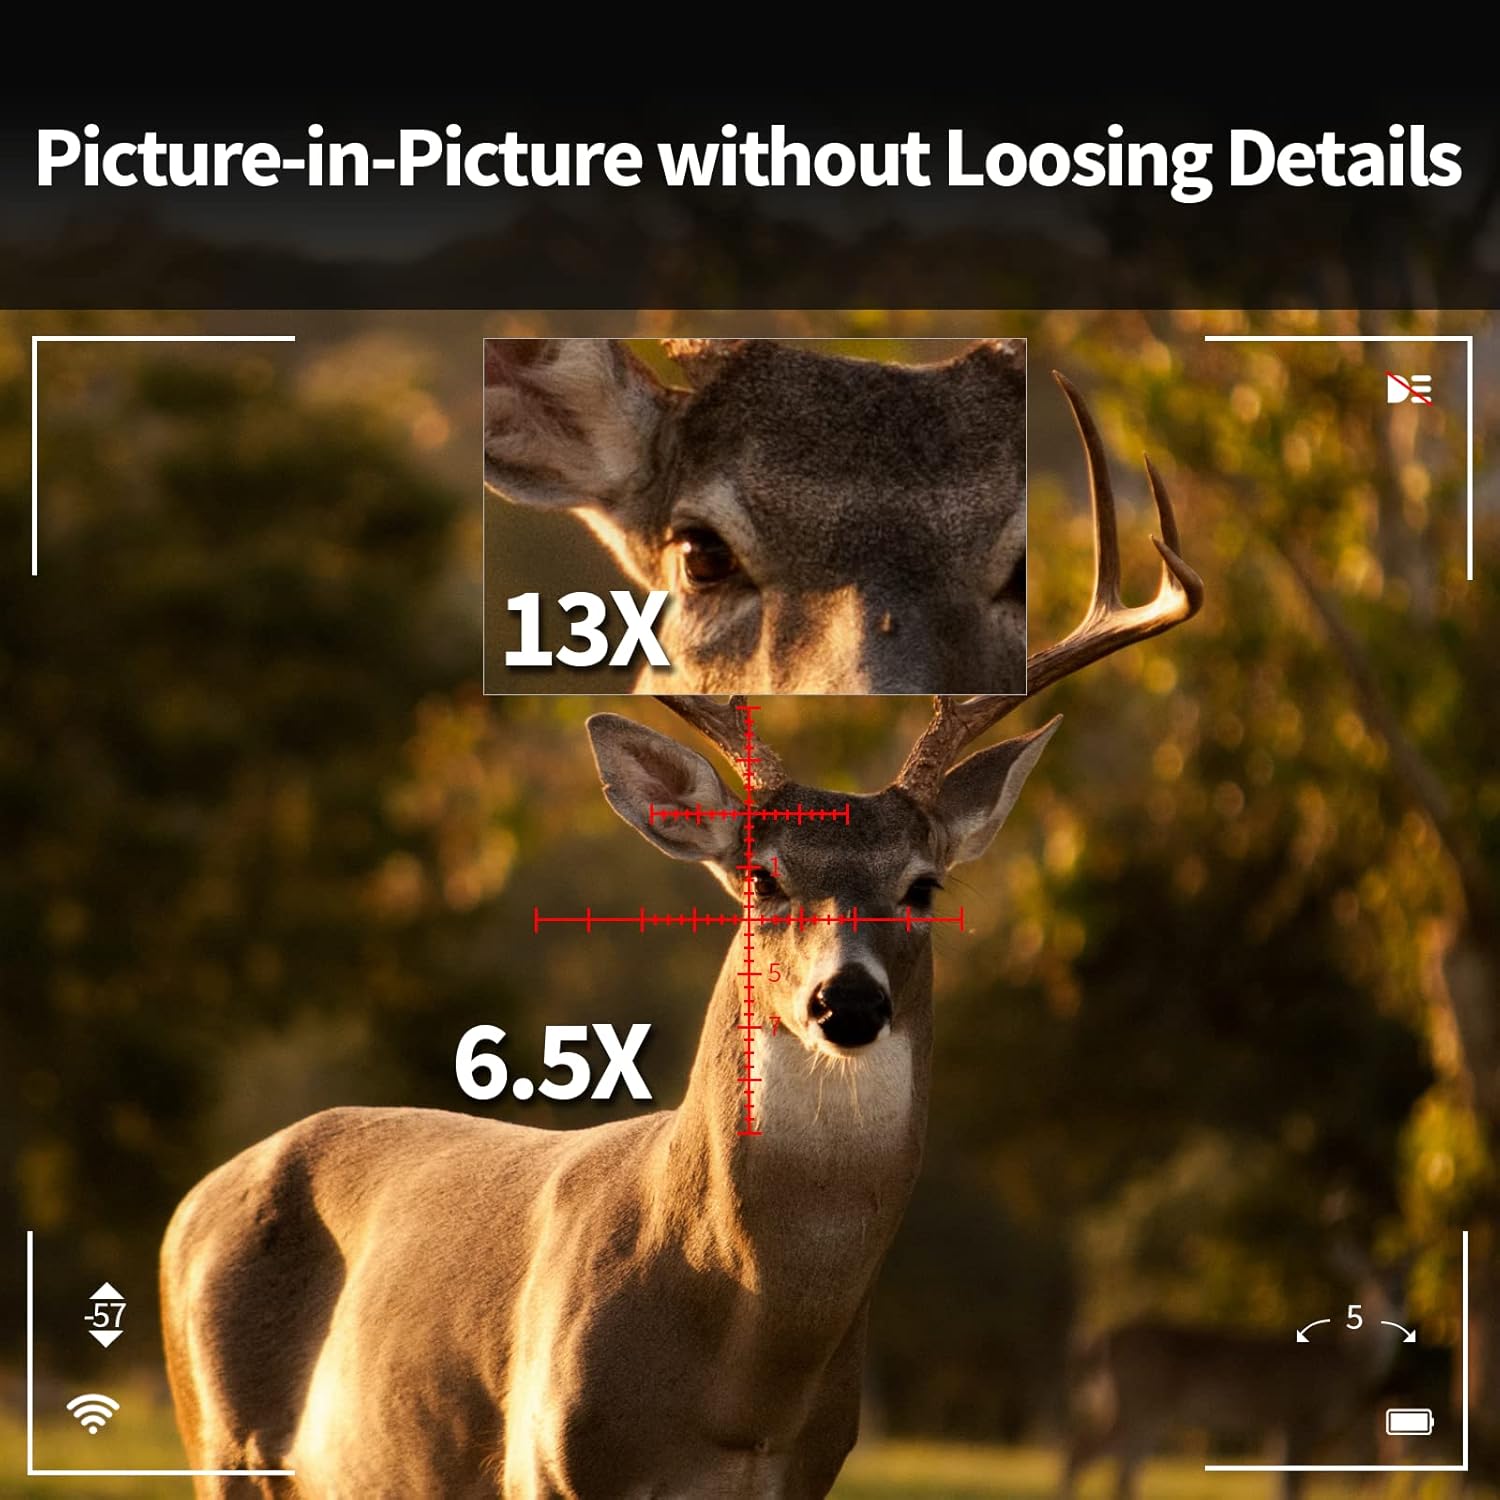
Figure 5: Picture-in-Picture display demonstrating 6.5x and 13x zoom levels.
4.6. Рэгуляванне фокусу
To adjust the focus, rotate the focusing ring located in the middle of the optic. Rotate left or right until your target appears clear and sharp.
4.7. Rangefinder
The built-in rangefinder provides precise distance measurements up to 1000m. Activate the rangefinder function via the menu or a dedicated button (refer to the control diagram for specific button functions).
4.8. Recording Video & Taking Photos
To record video, press and hold the 'Up' button. A timer will appear at the bottom of the screen indicating recording is active. To stop recording, press and hold the 'Up' button again. To take a photo, simply tap the 'Right' arrow button (photo button).
4.9. ViewСМІ
каб view recorded videos and photos, press and hold the 'Menu/Play' button. Use the arrow buttons to navigate through your media. You can delete or protect files from this menu. To exit the media viewing mode, press and hold the 'Menu/Play' button again.
4.10. Падключэнне да Wi-Fi
The scope supports WiFi connectivity for iOS and Android devices, allowing for remote viewing and control via a dedicated app.
Video 2: Night vision scope working with APP. This video demonstrates connecting the night vision scope to a smartphone app via WiFi for remote viewвання і кантролю.
4.11. Gyroscope & E-Compass
The built-in 3D gyroscope and E-compass provide stability and directional information, ensuring accurate viewing in various outdoor environments.
5. One-Shot Zeroing
The scope features a quick one-shot zeroing function to save time and ammunition.
- Fire a shot at your target.
- Activate the zeroing mode (refer to the menu or control diagram).
- Adjust the reticle/crosshair to align with the first impact point using the directional buttons.
- Confirm the zeroing. The scope will then be zeroed.

Figure 6: Visual guide for the one-shot zeroing process.
Video 3: One-shot zeroing demonstration. This video illustrates the quick and efficient one-shot zeroing procedure.
6. Тэхнічнае абслугоўванне
6.1. Зарадка
To charge the device, connect the provided USB-C cable to the charging port on the scope and to a power source. A red light will indicate charging is in progress, and the screen will show a charging icon.
6.2. Уборка
Use a soft, lint-free cloth to clean the lenses and the device body. Avoid using abrasive materials or harsh chemicals that could damage the optics or housing. For stubborn dirt, a lens cleaning solution designed for optics can be used sparingly.
6.3. Захоўванне
When not in use, store the scope in a dry, cool place away from direct sunlight and extreme temperatures. Ensure the battery is fully charged before long-term storage to maintain battery health.
7. Выпраўленне непаладак
- Прылада не ўключаецца: Пераканайцеся, што акумулятар усталяваны правільна і цалкам зараджаны.
- Размытае выява: Adjust the focus ring until the image is clear. Check the diopter adjustment if available.
- Poor night vision performance: Пераканайцеся, што ІЧ-падсвятляльнік уключаны і ўсталяваны на адпаведны ўзровень інтэнсіўнасці.
- Праблемы з падключэннем Wi-Fi: Ensure the scope's WiFi is enabled and your mobile device is within range. Restart both devices if necessary.
- Праблемы з запісам: Check if the Micro SD card is properly inserted and has sufficient free space. Format the card if necessary (this will erase all data).
8. Тэхнічныя характарыстыкі
| Асаблівасць | Спецыфікацыя |
|---|---|
| Марка | OWLNV |
| Назва мадэлі | L3-LRF 6.5-13X |
| Колер | Чорны |
| Памеры прадукту | 7.34 см Д х 2.26 см Ш х 2.76 см В |
| Вага прадмета | 1.2 фунта (565 г) |
| Матэрыял | Алюміній |
| Мінімальнае павелічэнне | 6.5 х |
| Сумяшчальныя прылады | Вінтоўка |
| Тып мацавання | Мацаванне Пікаціні |
| Начное бачанне | так |
| Тып прыцэльнай сеткі | Крыж |
| Рэйтынг воданепранікальнасці | IP67 |
9. Гарантыя і падтрымка
The OWLNV L3-850/LRF 6.5-13X HD Digital Day & Night Vision Rifle Scope comes with a 1-year warranty. For technical support, warranty claims, or any inquiries, please contact OWLNV customer service through the retailer where the product was purchased or visit the official OWLNV store on Amazon.


