1. Прадукт скончыўсяview
The ciciglow H410 Motherboard is a Micro ATX desktop board designed for 10th Generation Intel Core, Pentium Gold, and Celeron processors with an LGA 1200 socket. It supports dual-channel DDR4 memory up to 64GB and features comprehensive connectivity options including M.2 NVMe, USB 3.2, and HD Multimedia Interface/VGA outputs. This motherboard is engineered for stable performance and an enhanced audio experience.
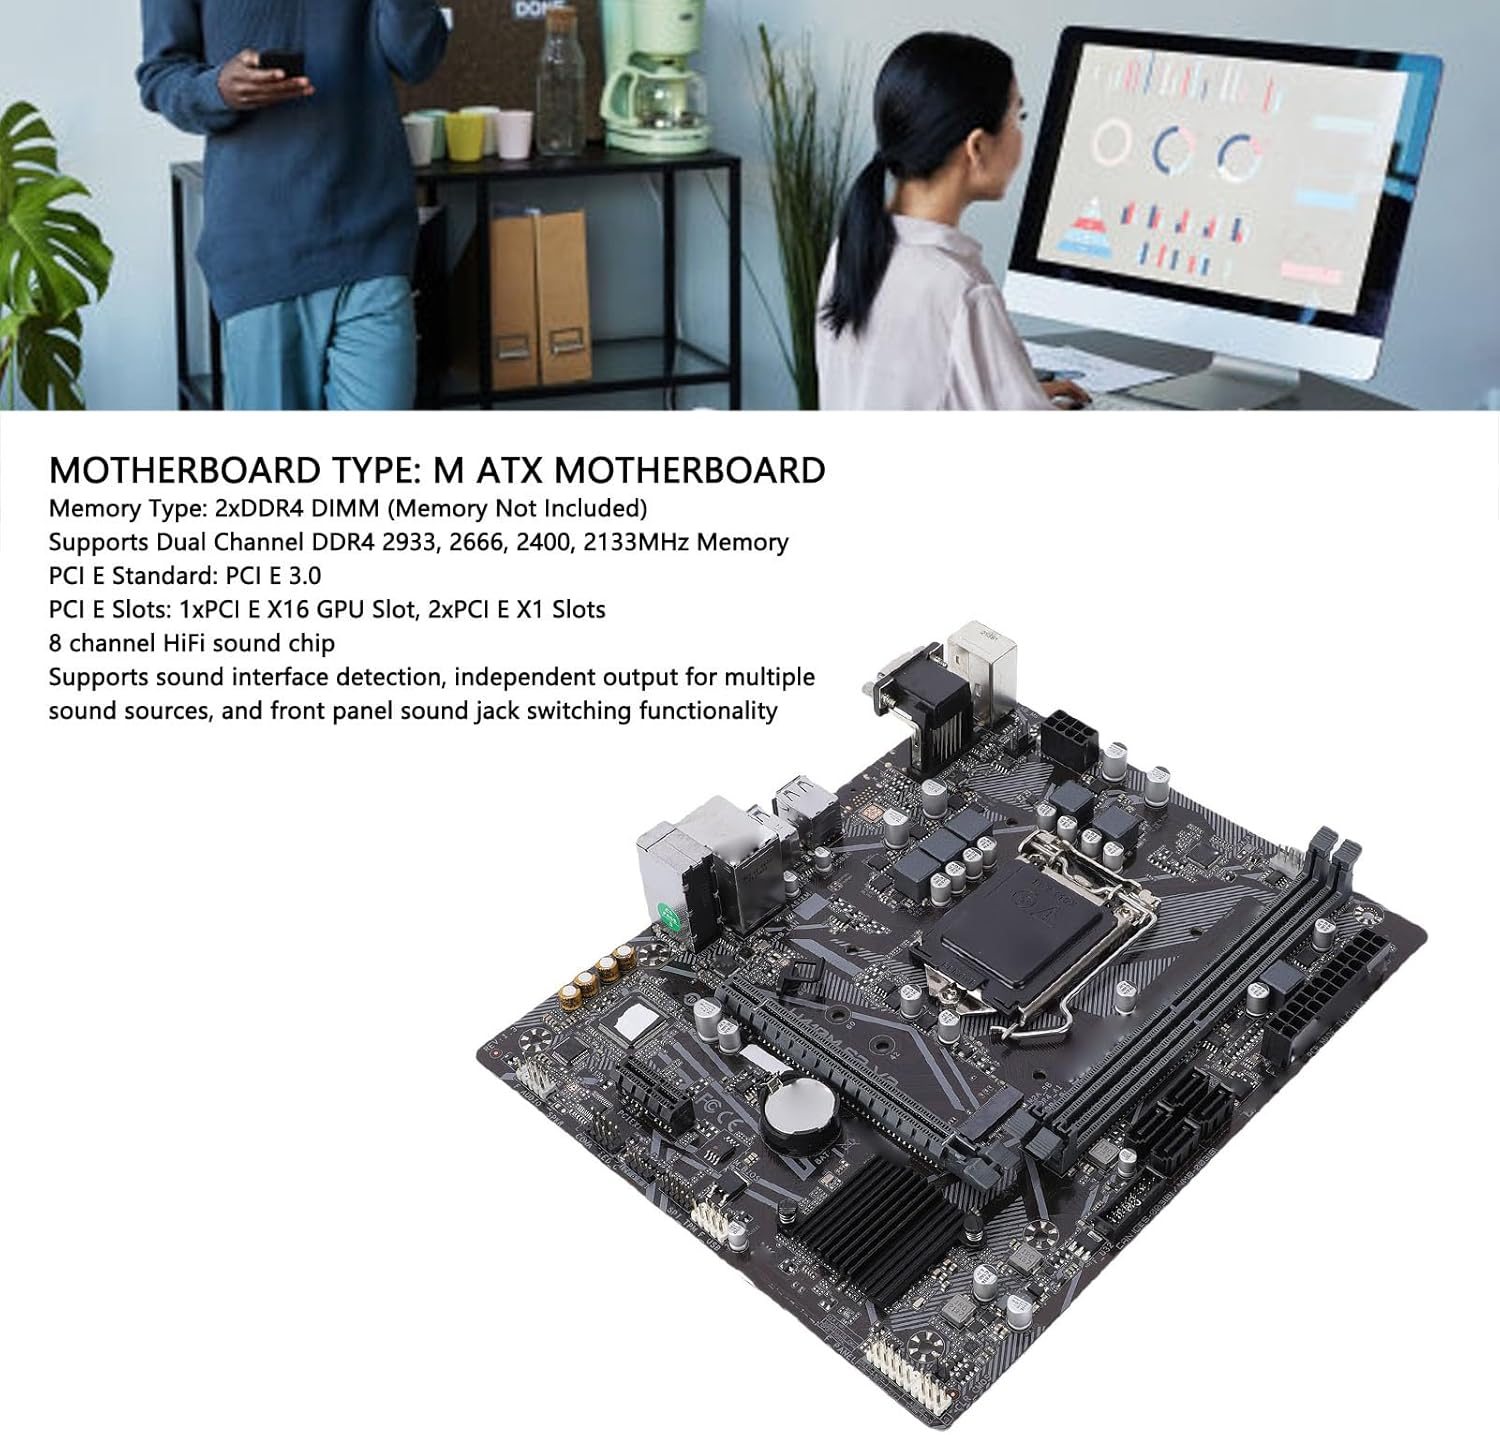
Малюнак 1.1: Закончанаview of the ciciglow H410 Motherboard highlighting key features.
2. Змесціва ўпакоўкі
Калі ласка, пераканайцеся, што ўсе прадметы наяўныя і ў добрым стане пасля адкрыцця ўпакоўкі:
- 1 x ciciglow H410 Motherboard
- 1 x I/O Backplate
3. Кіраўніцтва па наладцы
This section provides instructions for installing the motherboard and its components into your system.
3.1. Усталёўка працэсара (LGA 1200)
- Знайдзіце раз'ём працэсара LGA 1200 на матчынай плаце.
- Акуратна націсніце на рычаг нагрузкі ўніз і пацягніце яго ўбок, каб адкрыць вечка раздыма працэсара.
- Carefully align the notches on your 10th Gen Intel CPU with the corresponding keys on the socket. Ensure the golden triangle on the CPU matches the triangle on the socket.
- Устаўце працэсар у раз'ём, не прыкладаючы сілы. Ён павінен стаяць роўна.
- Close the socket cover and push the load lever back into its locked position. This will secure the CPU.

Figure 3.1: The LGA 1200 CPU socket area on the motherboard.
3.2. Memory (RAM) Installation (DDR4 DIMM)
The motherboard features two DDR4 DIMM slots, supporting up to 64GB of memory.
- Адкрыйце зашчапкі з абодвух канцоў слота DIMM.
- Сумясціце выемку на модулі памяці DDR4 з ключом у слоце DIMM.
- Insert the memory module firmly into the slot until the clips snap into place, securing the module.

Figure 3.2: DDR4 DIMM slots and SATA ports.
3.3. Storage Device Installation (SATA, M.2 NVMe)
The motherboard supports both SATA 6Gb/s drives and M.2 NVMe SSDs.
- Дыскі SATA: Connect your SATA SSDs or HDDs to the available SATA III interfaces using SATA data cables. Connect the other end of the cable to your storage device. Ensure power cables from your power supply are also connected to the drives.
- Цвёрдацельны назапашвальнік M.2 NVMe: Locate the M.2 socket 3 slot. Insert your M.2 NVMe SSD into the slot at an angle, then gently push it down and secure it with the provided screw.
3.4. Усталёўка платы пашырэння (PCIe)
The motherboard includes one PCIe 3.0 x16 slot for graphics cards and two PCIe 3.0 x1 slots for other expansion cards.
- Align your expansion card with the appropriate PCIe slot.
- Press down firmly until the card is seated correctly in the slot.
- Замацуеце карту да корпуса кампутара шрубай.
3.5. Падключэнне перыферыйных прылад і сілкавання
Connect your power supply unit (PSU) to the motherboard's 24-pin ATX power connector and the 8-pin CPU power connector. Connect front panel headers (USB, audio, power/reset buttons, LEDs) according to the motherboard manual. Finally, connect your monitor, keyboard, mouse, and other peripherals to the rear I/O ports.

Figure 3.3: Rear I/O panel with USB, Ethernet, and audio ports.
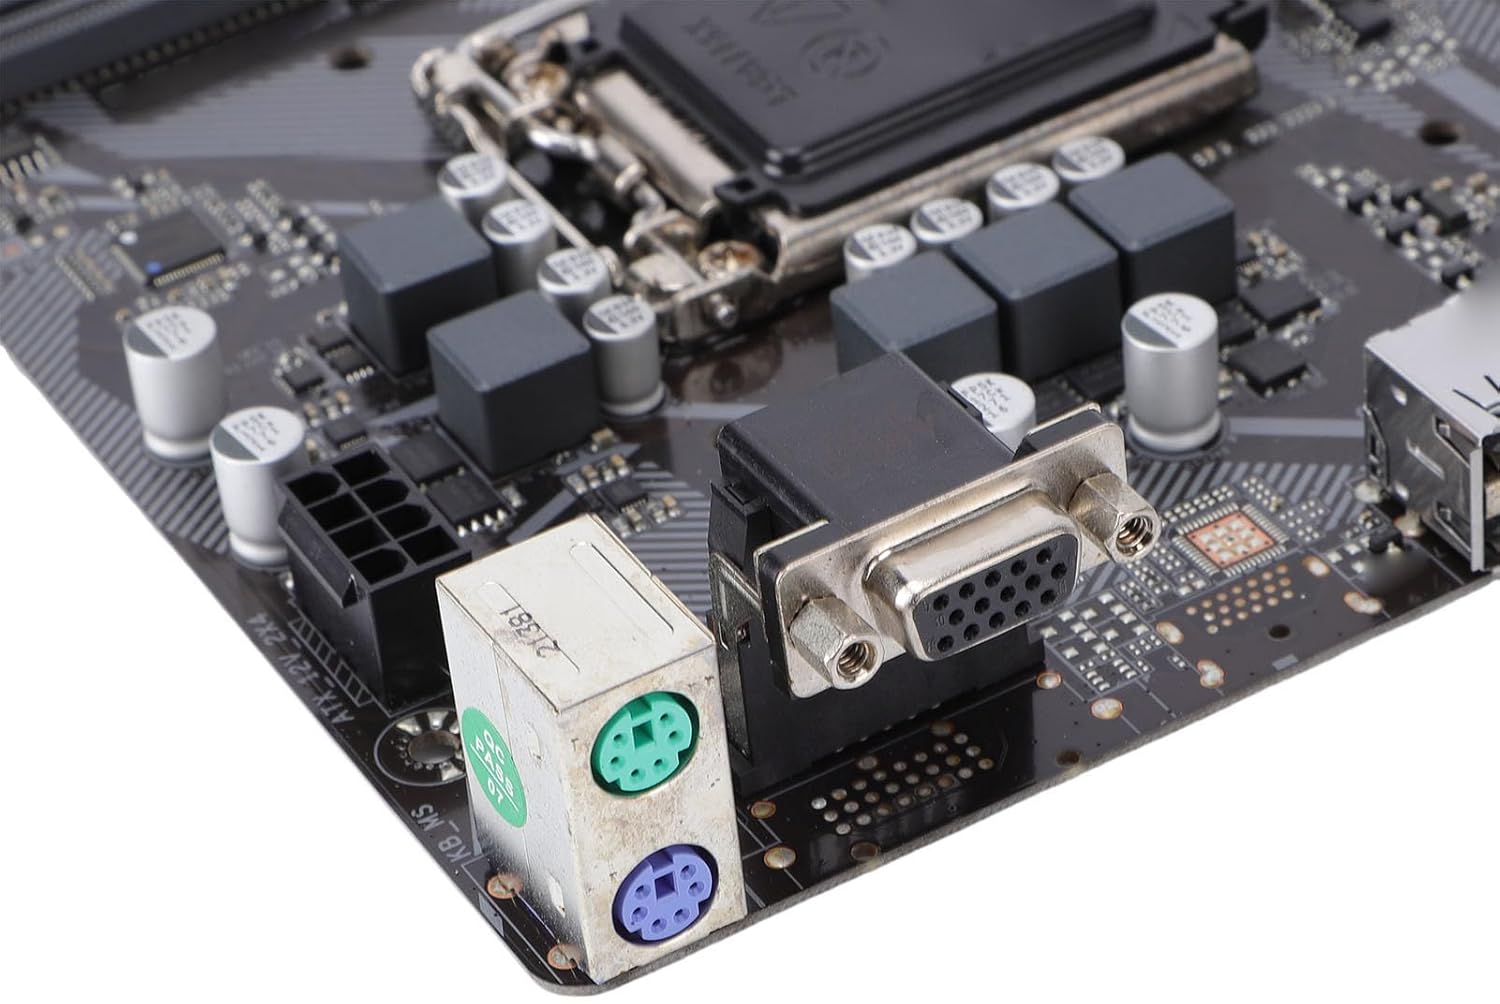
Figure 3.4: PS/2 ports for legacy keyboard/mouse and VGA port for display output.
4. Інструкцыя па эксплуатацыі
4.1. Пачатковая загрузка і доступ да BIOS
After assembling your system, connect it to a power source and a monitor. Press the power button. During the initial boot sequence, repeatedly press the DEL or F2 key (check your screen for the exact key) to enter the BIOS/UEFI setup utility. Here you can configure boot order, system time, and other advanced settings.
4.2. Ўстаноўка драйвера
After installing your operating system, it is crucial to install the latest drivers for your motherboard's components. These typically include chipset drivers, network drivers, audio drivers, and any other specific drivers for integrated peripherals. You can usually find these on the manufacturer's website or on a provided driver CD/USB drive.
5. Тэхнічнае абслугоўванне
Правільнае абслугоўванне забяспечвае даўгавечнасць і стабільную працу вашай матчынай платы і сістэмы.
- Выдаленне пылу: Regularly clean dust from inside your PC case, especially from heatsinks and fans, using compressed air. Dust accumulation can lead to overheating.
- Паток паветра: Ensure good airflow within your PC case. Keep cables tidy and ensure intake and exhaust fans are functioning correctly.
- Абнаўленні BIOS: Перыядычна правярайце інфармацыю вытворцы website for BIOS/UEFI updates. These updates can improve compatibility, stability, and performance. Follow the update instructions carefully to avoid system damage.
6. Выпраўленне непаладак
У гэтым раздзеле разглядаюцца распаўсюджаныя праблемы, з якімі вы можаце сутыкнуцца.
- Няма харчавання: Ensure all power cables (24-pin ATX, 8-pin CPU) are securely connected to the motherboard and the power supply is switched on. Check the power button connection to the front panel header.
- Няма дысплея: Пераканайцеся, што ваш манітор падключаны да правільнага графічнага выхаду (альбо да інтэграванай відэакарты на матчынай плаце, альбо да вашай спецыяльнай відэакарты). Пераўсталюйце відэакарту і модулі аператыўнай памяці.
- Нестабільнасць/збоі сістэмы: This can be caused by various factors. Check RAM seating, CPU temperature, and ensure all drivers are up to date. Run memory diagnostic tools.
- POST Errors/Beep Codes: If your system emits a series of beeps and fails to boot, consult the motherboard's specific beep code guide (often found in the full manual or manufacturer's website) to diagnose the issue (e.g., RAM error, graphics card error).
7. Тэхнічныя характарыстыкі
Detailed technical specifications for the ciciglow H410 Motherboard.
| Асаблівасць | Спецыфікацыя |
|---|---|
| Марка | цыцыглаў |
| Назва мадэлі | H410 |
| Гняздо працэсара | LGA 1200 |
| Сумяшчальныя працэсары | 10th Gen Intel Core, Pentium Gold, Celeron (up to 65W) |
| Набор мікрасхем | Intel H410 |
| Тэхналогія аператыўнай памяці | DDR4 |
| Слоты памяці | 2 модулі DDR4 DIMM |
| Максімальны аб'ём памяці | 64 ГБ |
| Тактавая частата памяці | 2133, 2400, 2666, 2933 MHz (Dual Channel, XMP support) |
| Інтэрфейс відэакарты | PCI Express |
| слоты PCIe | 1 х PCIe 3.0 x16, 2 х PCIe 3.0 x1 |
| Інтэрфейсы захоўвання дадзеных | 4 x Serial ATA III (6Gb/s), 1 x M.2 Socket 3 (PCIe 3.0 x4 mode) |
| Інтэрфейсы USB | 2 x USB 3.2 Gen1 (rear), 2 x USB 3.2 Gen1 (internal header), 4 x USB 2.0 (rear), 2 x USB 2.0 (internal header) |
| Відэа інтэрфейсы | 1 x HD Multimedia Interface 1.4b, 1 x VGA |
| Network Chip | Realtek RTL8111H Gigabit Network Card |
| Гукавы чып | Realtek ALC887 7.1-канальны HD Audio |
| Тып мацярынскай платы | Micro ATX |
| Раздымы харчавання | 1 x 24-pin ATX, 1 x 8-pin CPU |
8. Інфармацыя аб гарантыі
The ciciglow H410 Motherboard comes with a manufacturer warranty for 90 days from the date of purchase. Please retain your proof of purchase for warranty claims. For detailed terms and conditions, refer to the warranty documentation provided with your product or contact ciciglow customer support.
9. Падтрымка
For further assistance, technical support, or inquiries regarding your ciciglow H410 Motherboard, please refer to the following resources:
- Інтэрнэт-рэсурсы: Наведайце афіцыйны сайт ciciglow website for updated drivers, FAQs, and additional product information.
- Абслугоўванне кліентаў: Contact ciciglow customer support through their official channels for personalized assistance.