1. Уводзіны
This manual provides essential information for the safe and efficient operation, maintenance, and troubleshooting of your Profile GE Automatic Espresso Machine + Milk Frother. Please read these instructions thoroughly before first use and retain for future reference.

Image 1.1: The Profile GE Automatic Espresso Machine with a prepared espresso and a latte.
2. Інфармацыя па бяспецы
Заўсёды выконвайце асноўныя меры бяспекі пры выкарыстанні электрапрыбораў, каб знізіць рызыку пажару, паражэння электрычным токам і траўмаў людзей.
- Ensure the appliance is connected to a grounded outlet.
- Не апускайце прыладу, шнур або вілку ў ваду ці іншыя вадкасці.
- Адключайце вілку ад разеткі, калі яна не выкарыстоўваецца і перад чысткай.
- Не выкарыстоўвайце прыбор з пашкоджаным шнуром або вілкай.
- Трымайце рукі і шнуры далей ад гарачых паверхняў.
- Выкарыстоўвайце толькі рэкамендаваныя вытворцам насадкі.
3. Прадукт скончыўсяview
Прафіfile GE Automatic Espresso Machine is designed for convenience and quality, featuring an integrated grinder, milk frother, and smart connectivity.
3.1 Кампаненты
- Панэль кіравання: Touch-sensitive buttons for various drink selections and functions.
- Бункер для фасолі: Stores whole coffee beans for grinding.
- Рэзервуар для вады: Здымны бак для падачы вады.
- Носік для кавы: Падае завараную каву.
- Паравая палачка: Для ўспеньвання малака.
- Паддон для капель: Collects excess liquids.
- Кантайнэр для гушчы: Збірае выкарыстаную кававую гушчу.

Image 3.1: The top control panel with buttons for Espresso, Americano, My Brew, Steam, and Hot Water.

Image 3.2: The integrated bean hopper with whole coffee beans and grind size adjustment knob.

Image 3.3: The removable water reservoir being lifted from the machine.
4. Настройка
4.1 Распакоўка і пачатковае размяшчэнне
- Акуратна выдаліце ўсе ўпаковачныя матэрыялы.
- Place the machine on a stable, level surface away from heat sources and direct sunlight.
- Забяспечце дастатковую прастору вакол машыны для вентыляцыі і доступу да кампанентаў.
4.2 Першасная ўборка
Before first use, clean all removable parts with warm water and mild detergent. Rinse thoroughly and dry. Wipe the exterior of the machine with a damp тканіна.
4.3 Запаўненне рэзервуара для вады
- Remove the water reservoir from the machine (refer to Image 3.3).
- Fill with fresh, cold drinking water up to the MAX line.
- Replace the reservoir securely into the machine.
4.4 Даданне кававых зерняў
- Open the lid of the bean hopper (refer to Image 3.2).
- Pour whole coffee beans into the hopper. Do not overfill.
- Надзейна зачыніце вечка.
4.5 Уключэнне і пачатковае паласканне
- Падключыце шнур сілкавання да заземленай электрычнай разеткі.
- Press the power button on the control panel. The machine will perform an initial rinse cycle.
- Place a container under the coffee spout to collect the rinse water.
4.6 SmartHQ App Connection
For enhanced customization and software updates, connect your espresso machine to the SmartHQ app.
- Download the SmartHQ app from your device's app store.
- Follow the in-app instructions to pair your espresso machine.
- Customize drink preferences, volume, and strength through the app.

Image 4.1: Using the SmartHQ app to control and customize the espresso machine.
5. Інструкцыя па эксплуатацыі
5.1 Заварванне кавы
The machine offers Espresso, Americano, Lungo, and Hot Water options. The 'My Cup' setting is pre-set to Ristretto and can be adjusted via the SmartHQ app.
- Ensure the water reservoir is filled and the bean hopper contains coffee beans.
- Пастаўце кубак пад носік кавы.
- Select your desired drink (Espresso, Americano, Lungo, My Cup) from the control panel.
- Машына аўтаматычна змеле зерні, заварыць і выдасць каву.

Image 5.1: The espresso machine dispensing a fresh shot of espresso.
5.2 Рэгуляванне памеру памолу
The integrated conical burr grinder allows for 5 levels of grind size adjustment, from coarsest to finest, to optimize flavor extraction.
- Locate the grind size adjustment knob inside the bean hopper (refer to Image 3.2).
- Turn the knob to select your desired grind setting. Finer grinds are suitable for espresso, while coarser grinds are better for longer coffee types.
5.3 Using the Steam Frother
The steam frother creates various milk textures for cappuccinos, lattes, and more.
- Fill the included stainless steel frothing pitcher with cold milk.
- Апусціце паравую трубку ў малако.
- Націсніце кнопку «Пар» на панэлі кіравання.
- Move the pitcher to achieve desired foam texture.
- Once finished, press the 'Steam' button again to stop.
- Immediately clean the steam wand after each use to prevent milk residue buildup.
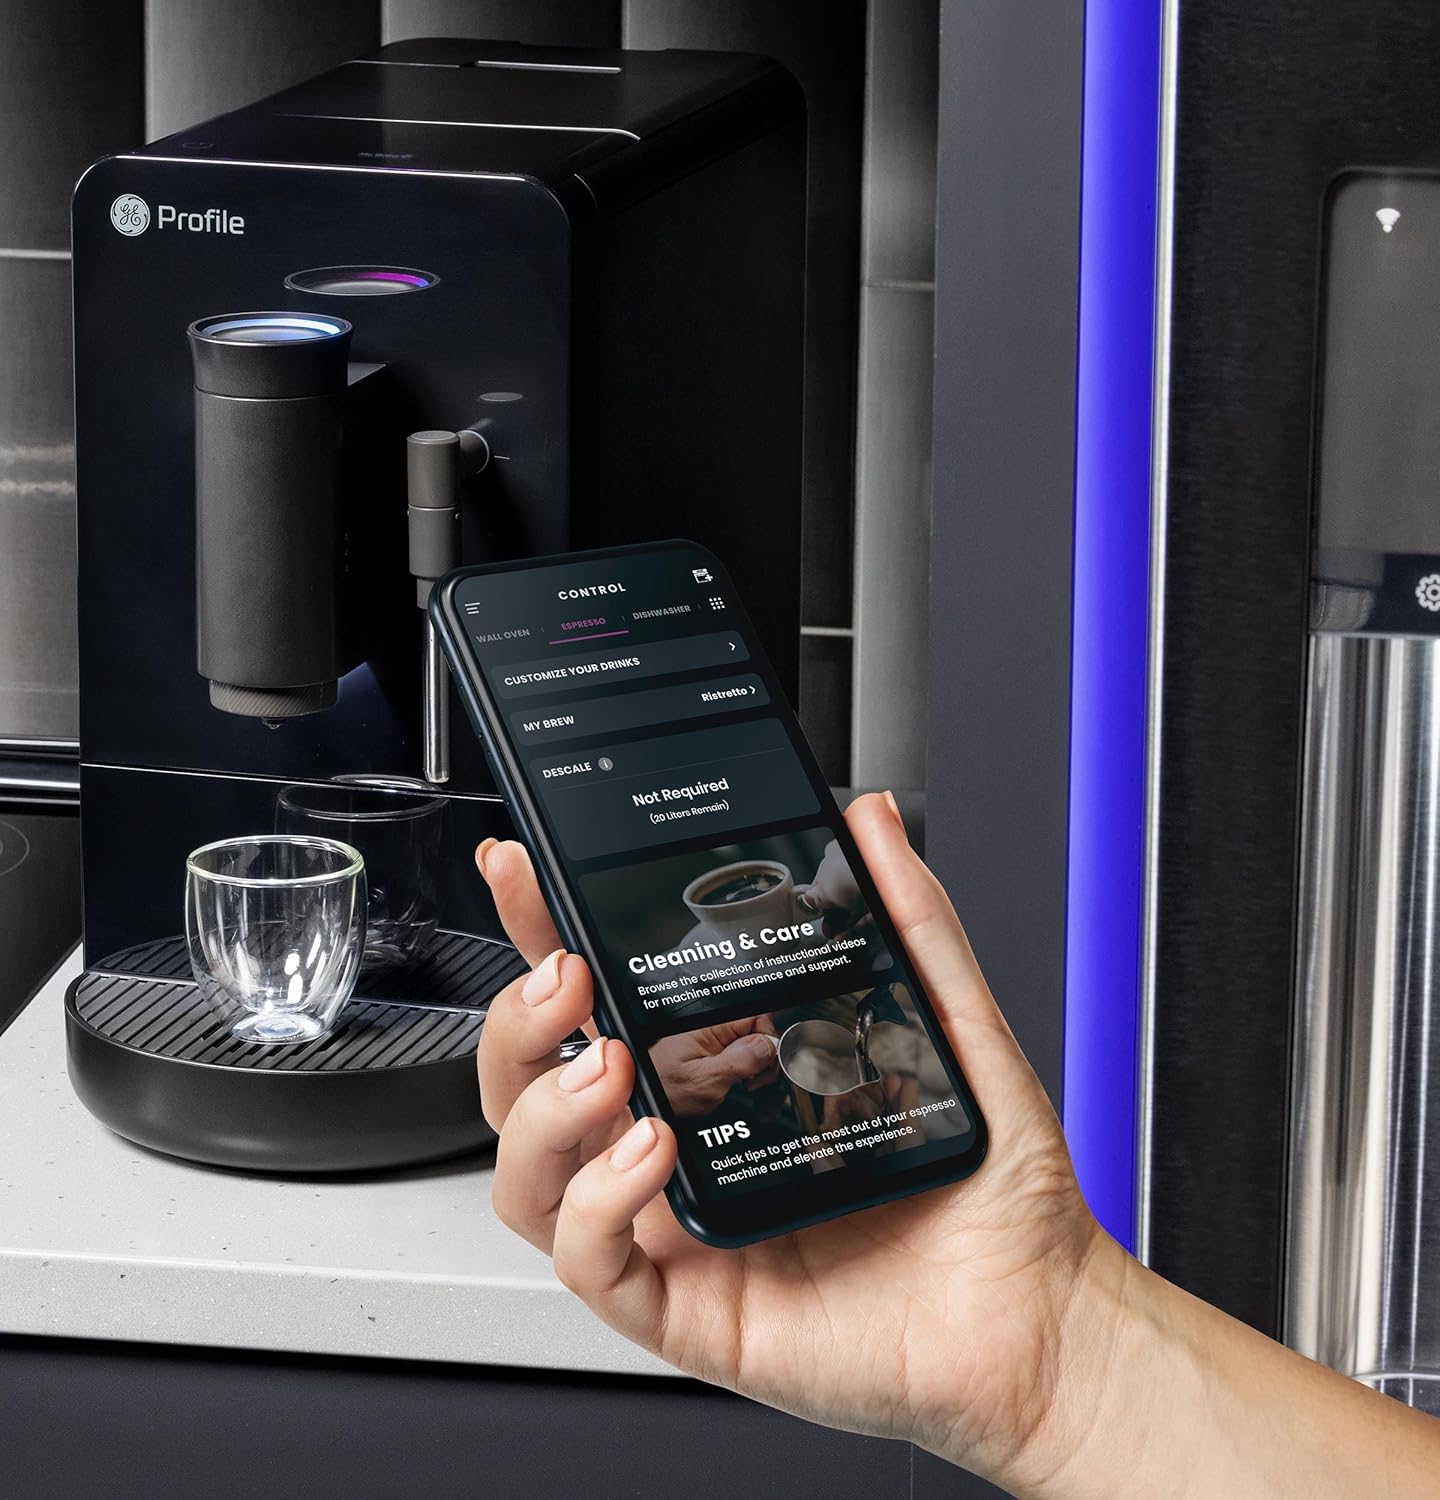
Image 5.2: A hand using the steam wand to froth milk in a stainless steel pitcher.
6. Тэхнічнае абслугоўванне
Рэгулярная чыстка і абслугоўванне забяспечваюць аптымальную прадукцыйнасць і даўгавечнасць вашай эспрэса-машыны.
6.1 Штодзённая ўборка
- Паравая палачка: Пасля кожнага выкарыстання працірайце паравую трубку вадойamp cloth. Purge steam briefly to clear any milk residue from the nozzle.
- Паддон для кропель і кантэйнер для кавовай гушчы: Штодня апаражняйце і прамывайце кантэйнер для гушчы. Машына паведаміць, калі трэба апаражніць яго.
- Рэзервуар для вады: Штодня прамывайце і далівайце свежай вады.
6.2 Штотыднёвая ўборка
- Блок заварвання: The brew unit is typically removable for rinsing under running water. Refer to the included cleaning kit instructions for detailed steps.
- Бункер для фасолі: Periodically clean out any oil residue or old beans.
6.3 Накіп
The machine will prompt you when descaling is required. Use a descaling solution specifically designed for espresso machines and follow the instructions provided with the descaling agent or in the SmartHQ app.
7. Выпраўленне непаладак
У гэтым раздзеле разглядаюцца распаўсюджаныя праблемы, з якімі вы можаце сутыкнуцца пры выкарыстанні эспрэса-машыны.
| праблема | Магчымая прычына | Рашэнне |
|---|---|---|
| No coffee dispensed / "Add Beans" message | Bean hopper empty or beans not feeding correctly. | Refill bean hopper. Gently stir beans to ensure they feed into the grinder. |
| Кава занадта слабая або вадзяністая | Grind size too coarse, insufficient coffee dose, or descaling needed. | Adjust grind size to a finer setting. Check SmartHQ app for strength settings. Perform descaling if prompted. |
| Малако не ўспеньваецца належным чынам | Steam wand clogged, milk type unsuitable, or insufficient steam pressure. | Clean steam wand thoroughly. Use fresh, cold milk. Ensure machine is heated to steam temperature. |
| Машына не ўключаецца | Не падключана, адключана харчаваннеtage, or circuit breaker tripped. | Check power connection. Verify power outlet functionality. Reset circuit breaker if necessary. |
| SmartHQ app connectivity issues | Incorrect Wi-Fi password, network interference, or app bug. | Verify Wi-Fi credentials. Ensure machine is within Wi-Fi range. Restart app and machine. Check for app updates. |
8. Тэхнічныя характарыстыкі
- Марка: профіfile
- Назва мадэлі: GE Profile Automatic Espresso Machine + Frother
- Нумар мадэлі тавару: P7CEBBS6RBB
- колер: Чорны
- Памеры прадукту: 7" Г x 16" Ш x 12.5" У
- Вага прадмета: 16 фунта
- тtage: 120В
- Рэжым працы: Цалкам аўтаматычны
- Асаблівасці: Built-In Bean Hopper, Built-In Conical Burr Grinder & Adjustable Grind Size, Programmable My Brew Setting, Steam Frother & Frothing Pitcher, WiFi Connected
- Уключаныя кампаненты: Набор для чысткі, кантэйнер для кававых зерняў, кававарка эспрэса, паравая трубка, збан для малака, рэзервуар для вады
- Тып уводу кавы: Цэлыя бабы
- Увод чалавечага інтэрфейсу: Сэнсарны экран

Малюнак 8.1: Памеры кававаркі эспрэса.
9. Гарантыя і падтрымка
This product is covered by a manufacturer's warranty. For specific warranty details, registration, or technical support, please refer to the warranty card included with your product or visit the official GE Profile website. You may also contact customer service through the SmartHQ app for assistance.


